Office and managers
Customers, sites and contacts
Declan Byrne
·
Last updated 10 Nov 2026
·
3 min read
**Who this is for:** office administrators, dispatchers and managers.
**What you will learn:** how FieldElite models a customer, its sites and the people on site — and how to give a customer portal access safely.
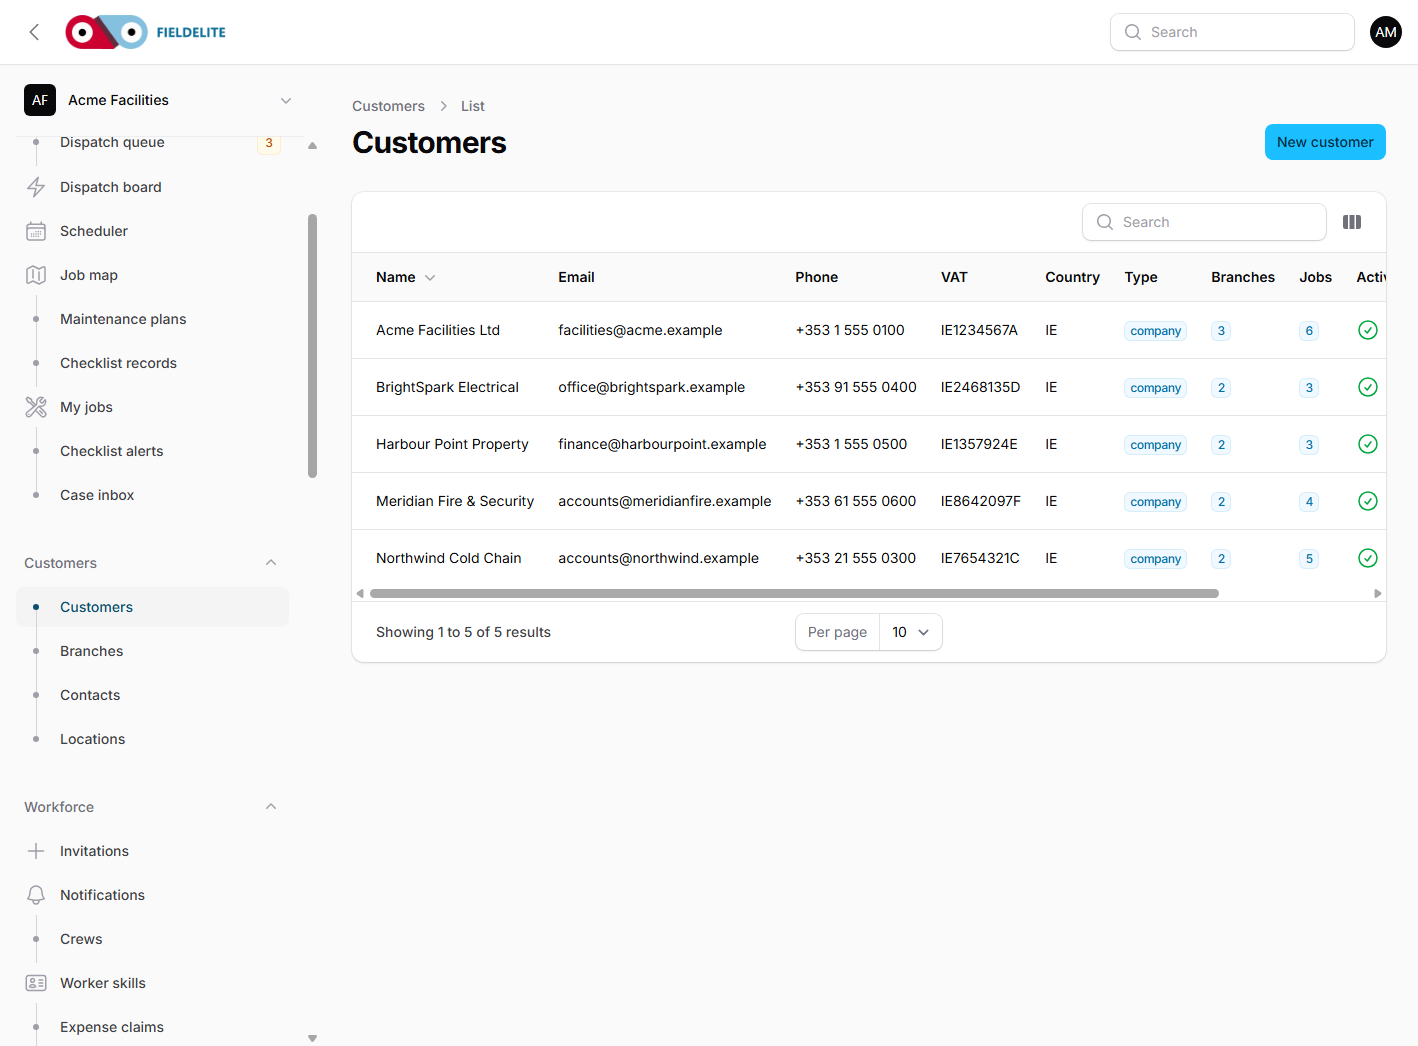
## The three levels
| Level | Meaning | Example |
|---|---|---|
| **Customer** | The company or individual who pays | Acme Facilities Ltd |
| **Branch** | A physical site or building | Riverside Offices, Dublin |
| **Location** | A named area inside a site | Plant Room (PR-01) |
Jobs belong to a customer and a branch. Assets can also belong to a location, so the field worker knows exactly where to go.
## Create a customer
1. Go to **Customers**.
2. Select **New customer**.
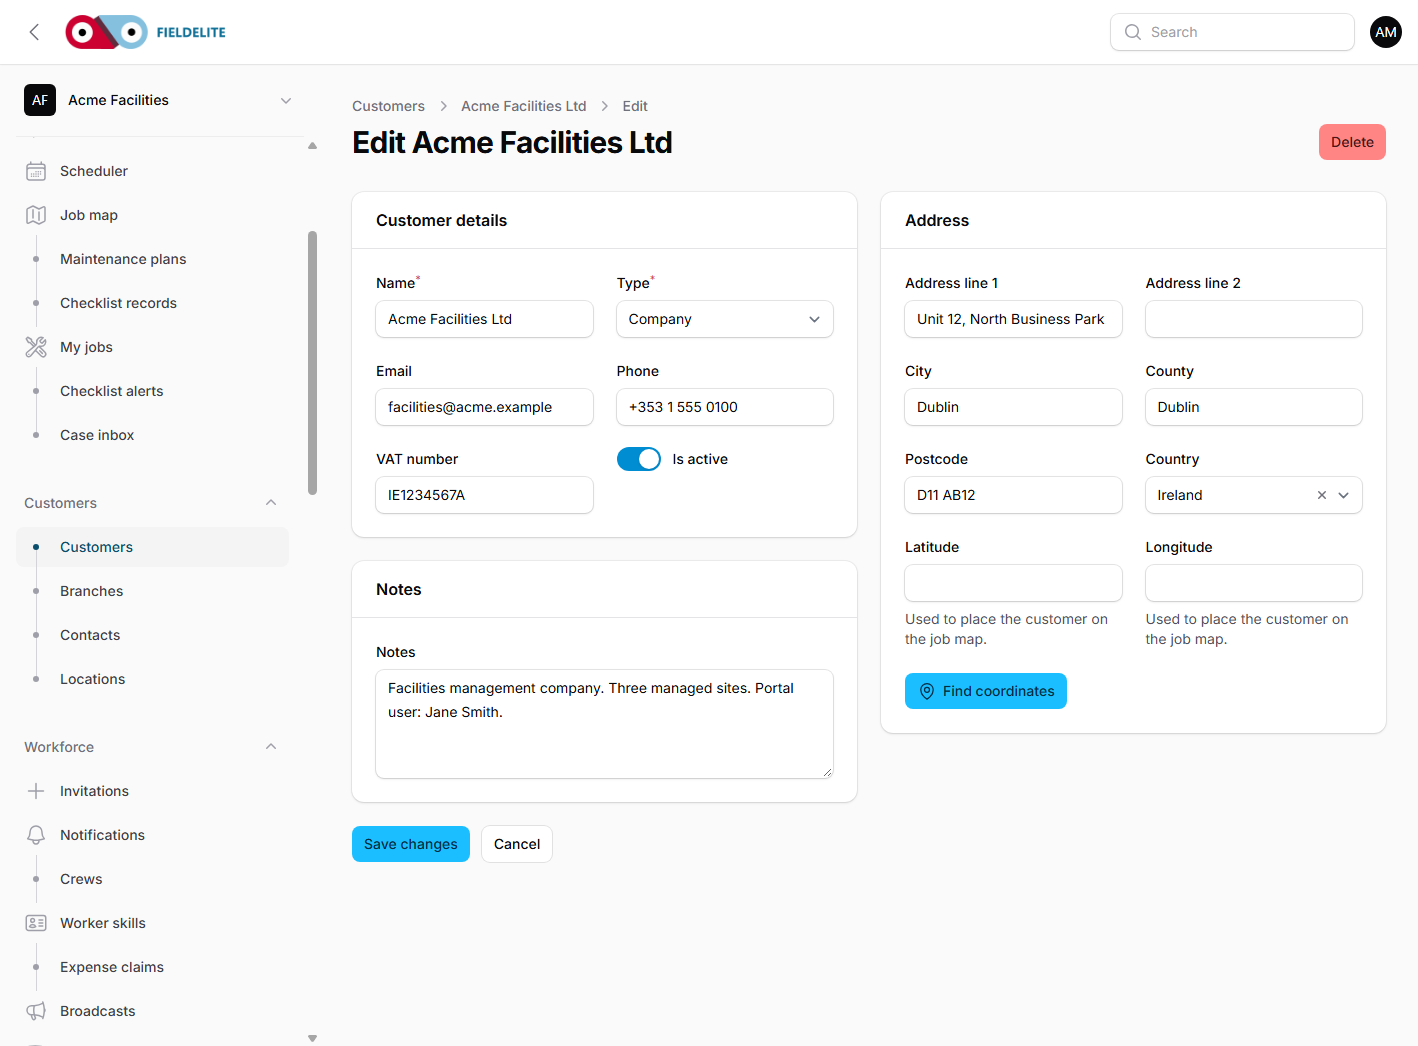
3. Choose the **Type**: company or individual.
4. Enter the legal name, email, phone and VAT number.
5. Enter the billing address. This address is used on quotes and invoices.
6. Add internal **Notes** that help the office — never put passwords or card details here.
7. Select **Create**.
### Add a site
1. Open the customer.
2. In **Branches**, select **Add branch**.
3. Give the site a clear name — the name the customer uses, not an internal code.
4. Add the address, postcode and map coordinates.
5. Mark the **Primary** site and **HQ** if they apply.
6. Add **Access notes**: gate codes, reception procedure, key collection, parking.
### Add a contact
1. Open the branch.
2. In **Contacts**, select **Add contact**.
3. Record the person's name, position, email and phone.
4. Mark the primary contact. This is the person the dispatcher calls first.
## Portal access
To let a customer sign in:
1. Open the customer record.
2. Set **Portal enabled** to on.
3. Ensure the customer has a valid, unique email address.
4. Set a password, or send a reset link.
5. Tell the customer the portal address: `https:///portal/login`.
Portal users only see their own customer account. They cannot see other customers, internal notes or other sites.
> **Warning:** Disabling portal access stops new sign-ins immediately. It does not delete the customer's historical documents.
## Billing profile
Open **Billing accounts** to control how a customer is invoiced:
- Legal name and tax number
- Billing email and accounts contact
- Payment terms
- PO required
- Account reference and credit limit
- Account hold
Set **PO required** when the customer cannot be invoiced without a purchase order. The invoice screen will then insist on a PO or an authorised exception.
## Custom fields
If your workspace uses **Custom fields**, extra fields appear on customers, branches, jobs and products. Custom fields are managed under **Settings → Custom fields** by an admin.
## Find a customer fast
- Use global search for the customer name or email.
- Filter the customer list by active status.
- Sort by name or created date.
- Open a customer and use the related tabs to jump to jobs, sites and documents.
## Tips
- **Tip:** Put the site's *real* access instructions in the branch notes. Field workers see them on the job.
- **Tip:** Use one branch per building, not one branch per job.
- **Warning:** Changing a customer's legal name or VAT number after an invoice is issued does not rewrite history. Issue a credit note and re-invoice if the legal details were wrong.
## Check your understanding
1. What is the difference between a branch and a location?
2. Where do you turn on portal access?
3. What happens when a customer requires a PO?
**Related:** [Jobs and the job lifecycle](03-jobs-and-workflow.md) · [Quotes, invoices and payments](05-quotes-invoices-payments.md)
Related articles
Using the online help
Who this is for: everyone in the office workspace. What you will learn: where the help centre lives, how to search it, and how to get from a screen to the right article. Open the h...
Getting started in the office
Who this is for: office administrators, dispatchers, managers and finance users. What you will learn: how to sign in to the right workspace, find your way around, and set up your p...
Jobs and the job lifecycle
Who this is for: office administrators, dispatchers, managers and supervisors. What you will learn: how to raise a job, assign it, move it through the status workflow, and close it...
Scheduling and dispatch
Who this is for: dispatchers, schedulers and operations managers. What you will learn: how to plan the day, assign the right worker, and keep customers informed. The four planning...